Please hang tight while I reload all the photos back.

My photo
I currently work at Davenport A+ Elementary School in Lenoir, NC.

Tuesday, November 12, 2019

Kindergarten Leaf rubbings

Kindergarten Leaf Rubbings
Here is an easy lesson for kindergartners that have stood the test of the  time. Leaf rubbings are usually easy and fun for all ages but especially for kindergartners. 
I used real leaves and leaf replicas for this lessons. The leaf replicas were harder to use since they weren't flat but they still worked. 

These are the leaf replicas. I purchased them from Blick art years ago. 


 I keep containers of peeled broken crayons for projects like this. 

  Students placed the leaves under their papers and used the side of a crayon to rub over the leaves. 
After they rubbed the leaves they painted over them with warm colored watercolors. 


This took one, fifty minute class period. 

Monday, November 4, 2019

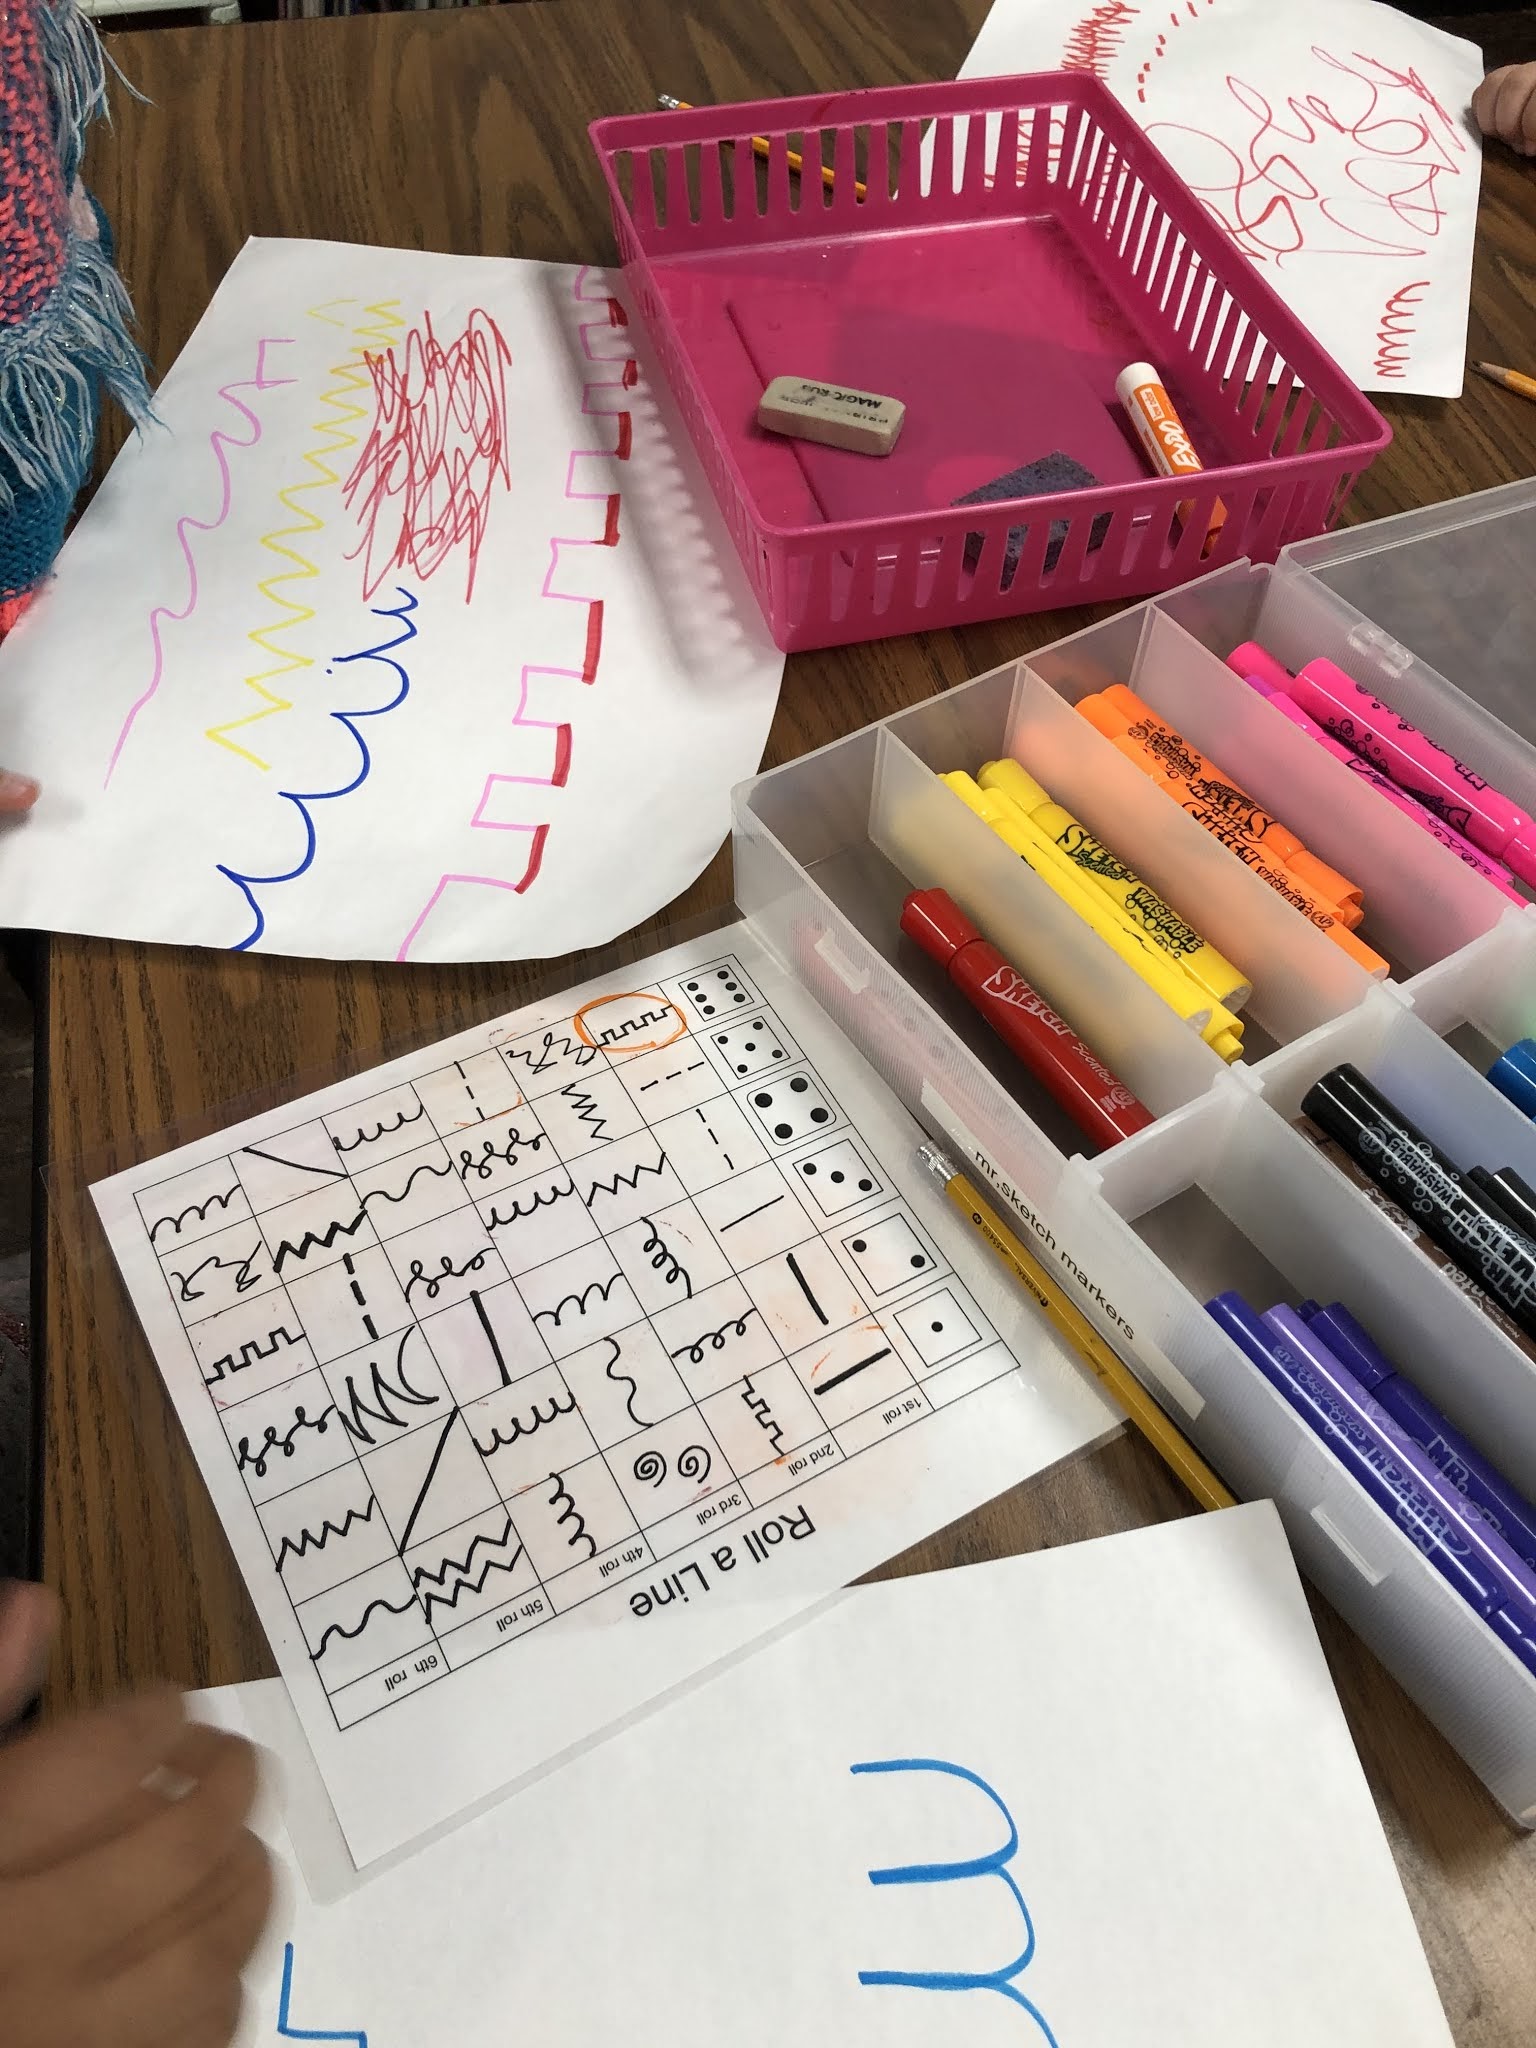
line game for kindergarten and 1st grade

Line game for kindergarten and 1st grade 


I wasn't sure how this game would work with my kiddos but it has been a great success. I used to create games like this when I was a classroom teacher for students' sight words and math facts, so why not for art?! 
You need the game board I created above, a dry erase marker, dice, baby wash cloth (to wipe the boards when the game is over) and a basket. I bought the dice and baby wash cloths at the Dollar Tree.  I laminated the game board with my personal laminator since the lamination seems to be stronger then the schools. 
Students used a piece of 12" x 18" white drawing paper, markers and crayons to create their art. 
Have them roll a dice into a basket. If they don't they  usually roll off the tables and under a cabinet. Save your sanity and have them roll the dice in a basket! 
I have the students mark at the top of the game board each roll and then they count down the column and circle what line they land on. They have to tell their group the name of the line and then the whole table draws the line they landed on. 


The last step was to use the side of a crayon and rub colors all over their papers. This is a great lesson for subs. 


Monday, October 28, 2019

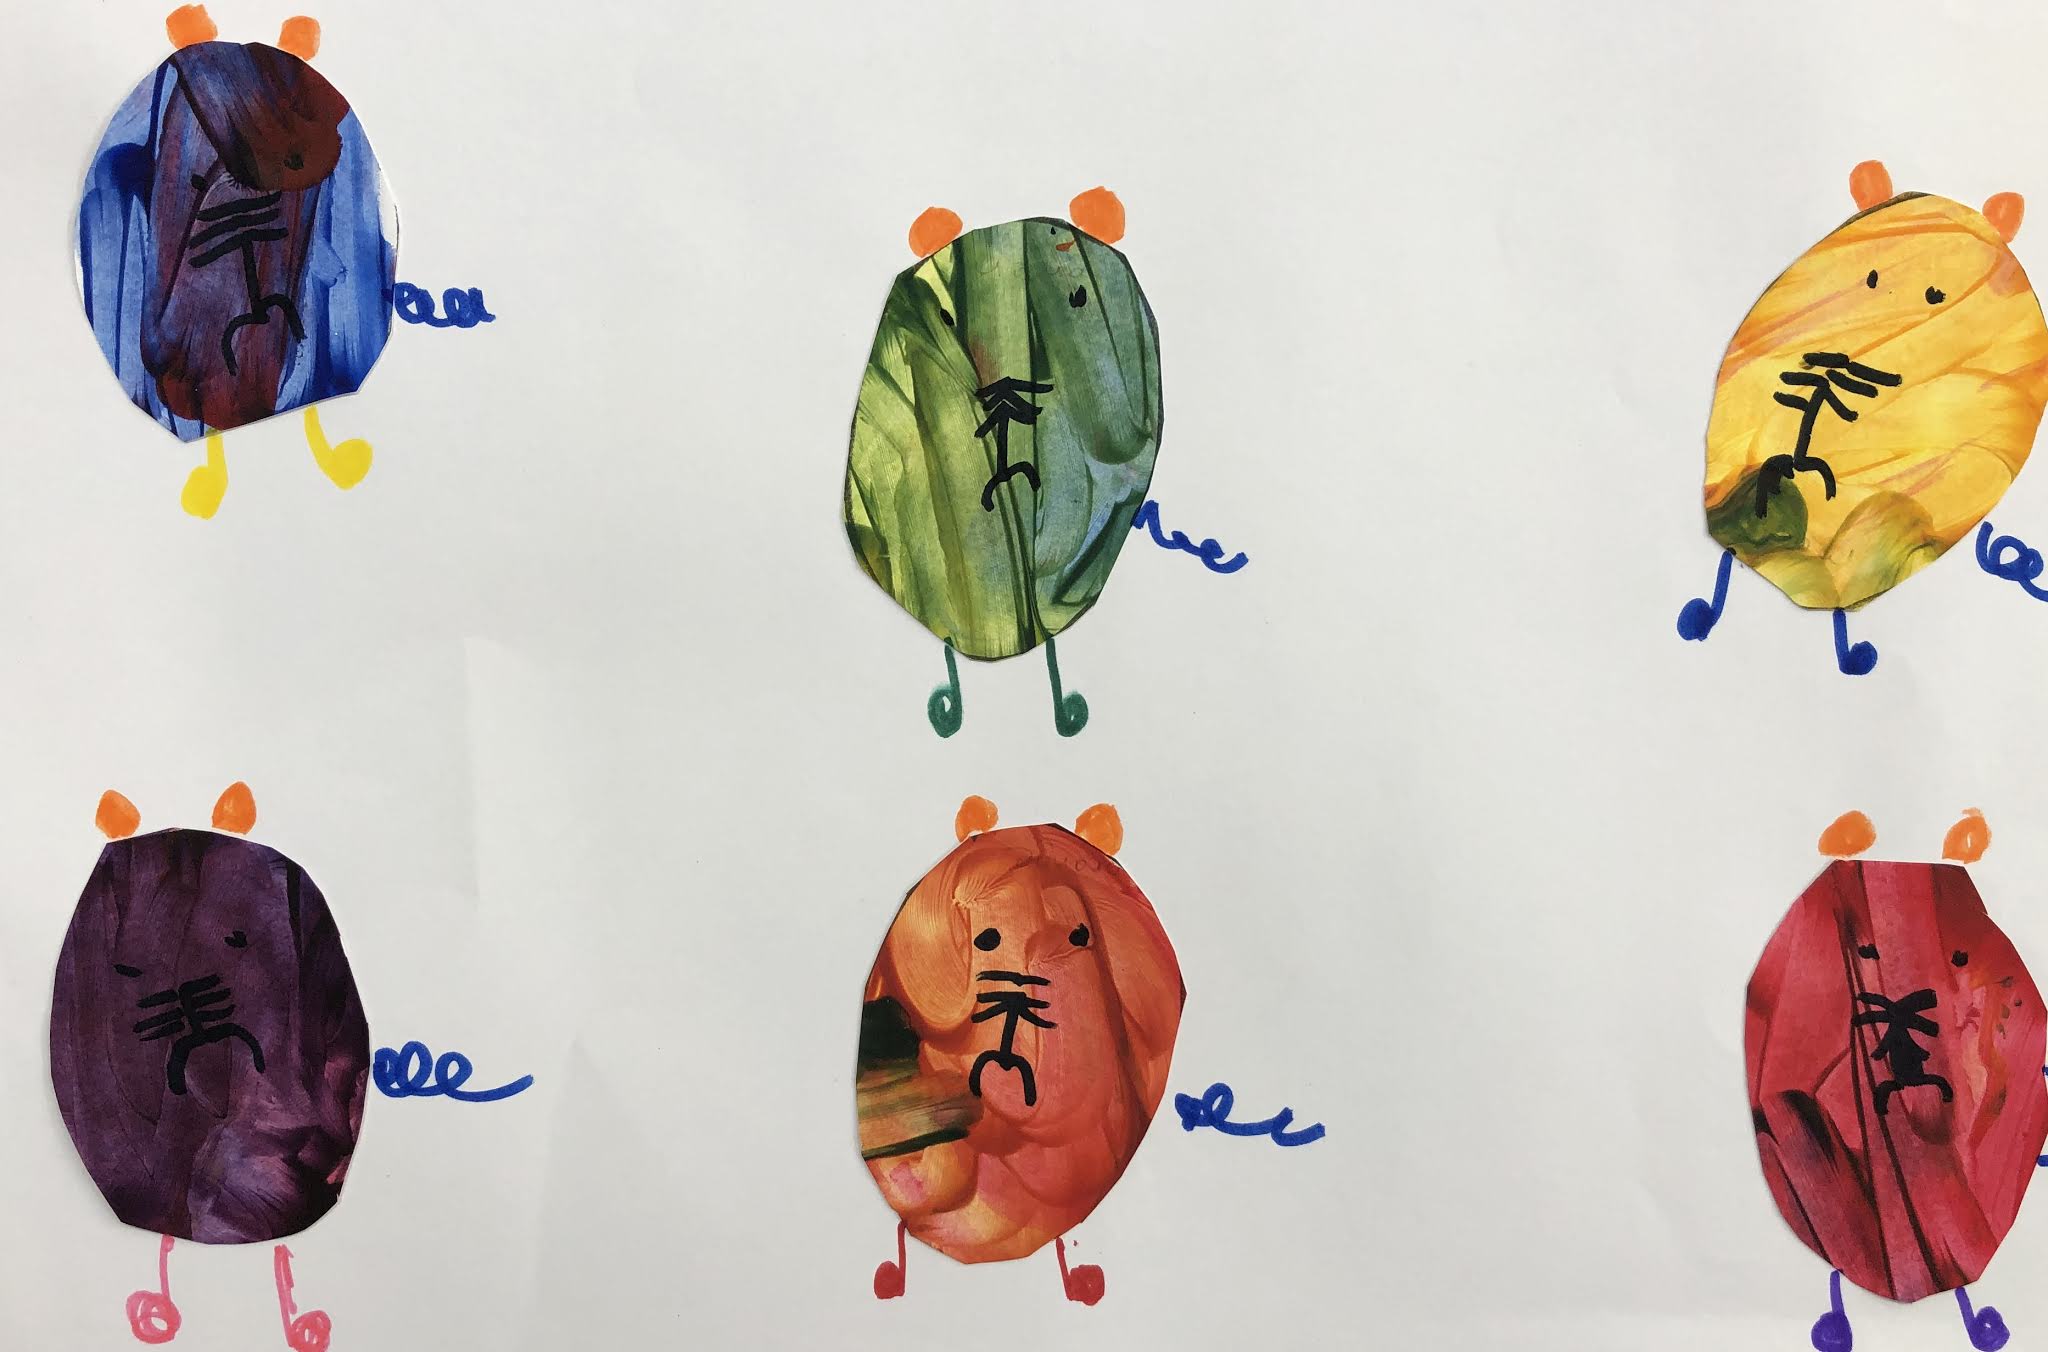
Mouse paint kindergarten art lesson

Mouse paint

Kindergarten is such a challenge for the beginning of the year. I found this lesson on Pinterest. I just adjusted it to fit the needs of my kiddos. 
On the first day I played the video on YouTube of Sesame Street titled "Primary Colors". It's only 1:30 minutes long. It has a very catchy tune that the kids will enjoy singing. We also read the book "Mouse Paint" by Ellen Walsh. If you don't have a copy you can always find someone on You Tube reading it. 
I provided each student with a 9" x 12" piece of multi-media paper with six ovals printed on them. 
I went around the room and put small spoonfuls of each of the primary colors on the appropriate ovals and then the students mixed the paint with a finger. They were instructed to wipe their fingers off onto the newspapers covering their tables. When they completed all of mixing the colors then they could wash their hands.

Some students did a great job of mixing their colors and staying into the appropriate oval, others got a little carried away and mixed a couple together. I wasn't to concerned since this was the first time many students had experienced finger painting. I wanted them to experience the excitement of discovering how to make the secondary colors but some experienced how to make brown instead! 
On day two students cut out their ovals, glued them onto a 12" x 18" drawing paper and made them into mice using markers.


Kindergarten Starry Night Owls

Kindergarten Starry Night Owls
You can watch my demonstration videos below. Sorry I couldn't find my finger painting video! 


                                             Part one. I don't know why it seems like I am yelling!

                                                                             Part two.
On the first day of the project we discussed Van Gogh's Starry Night. 
Students then finger painted their version of the painting on 12" x 18" multi-media paper using blue and purple finger paint. We painted it vertically since we would be gluing an owl in the middle. We discussed the wind, the village and of course the stars. 


All kids need to experience finger painting! Yes it's a lot of work but the kids love it. Cover your tables with newspaper and then I went around to each student and gave them a spoon full of purple and blue paint to mix. This took one fifty minute class period. 
On the second day I instructed students on how to draw an owl from the letter "U". They traced them with a black marker and colored them with neon oil pastels. We talked a lot about using good craftsmanship (coloring all the spaces) and doing our best. 


On day three students finished coloring their owls and cut them out. I have found if I teach them to concentrate on just cutting off the white paper then they are less likely to cut off the feet and ears. Works like a charm (well most of the kids it does!).  

Students glued a tree branch about midway down the paper and then their owl on top. 


Thursday, October 10, 2019

Kindergarten Robot collages

Kindergarten Robot Collages


Part one of my demonstration video. 

Part two. 


Kindergarten is challenging at the beginning of the year. I'm always looking for great ideas. I have the kiddos for 50 minutes so when I come across an idea that works I want to share! 
I love this lesson that I came across from the blog "Paint brush Rocket". You can find the original idea here http://paintbrushrocket.blogspot.com/search/label/Kindergarten
It has a lot of prep work (you have to cut lots of shapes), but it's worth it. 
Read the book "Robot Zombie Frankenstein!" by Annette Simon. The book is about  two robots who change into various costumes. I discussed the various costumes and explained to students that they would be using geometric shapes to create their own robot. I also (since I used to be a kindergarten classroom teacher) discussed the text and making predictions in the story. 

Each student could pick a big construction paper rectangle for their body and add heads, legs etc. 
Students were encouraged to create any kind of robot they wanted. They had so much fun! 
This was day one. 


On the next class we discussed patterns. Students (with my help) glued their robot collage to a 12" x 18" piece of construction paper . They created patterns on the border with a black marker.
I always put the steps on the board. 


 Don't you love how this one has a book?