Please hang tight while I reload all the photos back.

My photo
I currently work at Davenport A+ Elementary School in Lenoir, NC.
Showing posts with label 3rd grade art lessons. Show all posts

Friday, November 29, 2024

Paul Klee 3rd grade bleeding tissue paper collage

 Paul Klee 3rd grade art lesson

My 3rd graders had so much fun with this assignment. Students are learning about ocean life in their classrooms, so this was a perfect lesson to accompany their unit. We viewed the many works of Paul Klee, with emphasis on his paintings with squares of color. Students divided their paper in half with the top being the sky and land and the ocean at the bottom. 


After they drew their ocean scene students traced over it with a black marker. Students were to use warm-colored bleeding tissue paper squares for the top of their drawings and cool colors for the ocean part. They wetted the top part with water, laid tissue paper squares on top then painted water on it again. 
 After they were dry I helped shake the squares off into the trash can. They loved this lesson! 


Tuesday, November 26, 2024

Picasso Blue Period Self Portrait 3rd grade art lesson

 Picasso Blue Period Self Portrait 3rd grade art lesson


My 3rd graders viewed Picasso's Blue and Rose period paintings and we discussed how colors can convey emotions. Thanks to Art Projects for Kids https://artprojectsforkids.org/picasso-projects-for-kids/ for the idea. I just changed it a bit. 
Students folded their 12" x 9" multimedia paper into fours which acted like a guide to help them draw big! After they drew the self-portrait,  they traced it with a black permanent marker, made a pattern with a white crayon on their shirt and background (if they wanted to), and then used liquid watercolors to paint over the entire thing. They turned out beautifully! 


Friday, November 22, 2024

3rd Grade Starry Night Oil pastel Owls

 3rd Grade Oil Pastel Owls

Students were given a 6" x 9" piece of scrap paper to make their owl pattern. They folded the paper in half and then I demonstrated how to draw half of an owl so that when they cut it out it would be the same on both sides. 
3rd graders drew a large tree branch across their 12" x 18" black paper and colored it with oil pastels. They traced their owl pattern on the branch and then they could use neon oil pastels or regular oil pastels to color them. The last step was to add a starry night to the sky like Vincent Van Gogh! 


Thursday, November 30, 2023

3rd grade winter mittens art project

 3rd Grade Winter Mittens art project 

I found a photo of something like this on Pinterest. It was a painting by adults but I thought my 3rd graders could do something similar. 

If you want to see how I taught this here is the link

https://youtu.be/bLXfo7TeBeY 

                Students painted a curvy or loopy line across a 12" x 18" piece of blue construction paper. 
They then used a q-tip and painted dots all over their paper. They loved this part! 
 I provided mitten patterns for my 3rd graders to trace. I reminded them to make sure they drew two left hand mittens and two right hand mittens. They used 12" x 18" multi media paper. 

We discussed various pattern ideas and then my kiddos used neon oil pastels to draw their designs. They loved the colors!
When the mittens were complete they painted over the pastels with liquid watercolors. I would remind them to keep the lids on each cup of paint while they aren't using them. I've had to many students ruin the watercolors because they drip paint over them. 


They could paint outside the lines since we would be cutting them out. 
Finally when the mittens were dry, they cut them out and glued them on their snowy sky paper. 


                                     I think they turned out great and they loved making them. 

Wednesday, November 8, 2023

3rd grade paper Molas National Hispanic Heritage Month

 3rd Grade paper Molas 


Here is a great lesson for National Hispanic Heritage Month, Molas! I started the lesson by showing many examples of Molas. We discussed the colors and the many designs used in the pieces. 

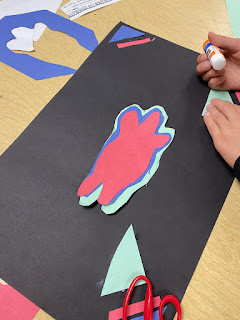
Students practiced drawing their animal or other main shape on a scrap piece of paper and then drew it on a 6" x 9" piece of construction paper. Students then picked two other pieces of construction paper and traced their shape while bumping it out each time. Remind the students to glue their shape on their paper first and then draw the space around it. I told them it was like drawing bubble letters. This part took a lot of help in the beginning but they got the idea in the end!


The next step was to glue their shape on the middle of a 12" x 18" piece of black construction paper. They were then to add various shapes and designs around the center shape.