Please hang tight while I reload all the photos back.

My photo
I currently work at Davenport A+ Elementary School in Lenoir, NC.

Friday, May 19, 2017

Photography lesson 1st grade

1st grade art 
Photography nature study 

Want an easy way to teach photography to students without a camera? Try sun-sensitive sheets. I tried it with my 1st graders and they loved the results. It just takes a little organizing (well a lot of organizing). 
Each student will need a piece of cardboard, one sun-sensitive paper, a leaf or other flat nature object and a piece of transparency (or other clear plastic film covering).


I had picked leaves and weeds in the morning before school started and put them on trays for the children to chose from. You could do a nature walk and allow students to pick their own leaves, but I was afraid it would take to much time. The children didn't seem to mind picking from my pile. 
I also had tubs of water on the tables before they arrived. 
I started off the lesson with showing students black and white nature photos. Of course I showed them lots of Ansel  Adam photos along with other photos of natural objects. 
Students then picked out a leaf or other natural object from my pile.

I quickly passed the papers out to each student where they were instructed to write their name on the white side, turn it over to the blue side,  place their leaf on it and lastly put the clear transparency on top. I made sure the cardboard rectangles were bigger than the sun sensitive paper so students could hold the plastic without touching their papers. 
When the class had them assembled we went outside and exposed them in the sunlight for two minutes. If you tell the students to hold the plastic down onto the cardboard and not touch the blue paper it shouldn't move as much.  Students should not move their leaves while in the sun. Once it is in sunlight the paper starts working. Students were so excited to see the blue disappear.


After two minutes we came back to the class and put them in the water on the tables for one minute. 


As they dry they will become darker. This lesson can be tricky if the children do not follow all the directions and move their leaves while in the sun. You can see from the above picture that a couple students' didn't come out because they moved their leaf while in the sun.


My first graders loved this lesson! 

Wednesday, May 17, 2017

Rainbow caterpillar kindergarten art lesson

Rainbow Caterpillar kindergarten art lesson 

I found this great idea from http://mrsjacksonartbd.weebly.com/kindergarten1.html. I just changed it a bit. It looks a little crafty but I wanted the children to review patterns  and they needed more practice with cutting. 


                 In my video I had the children use brown construction paper for the tree branch and green paper to make leaves. I made the video during COVID and I was on a cart. 

On day one the children painted a branch with leaves using tempera paint. I  put a paper plate with paint on each table so I could just toss them after class. Some classes used tan paper and some used white paper. 

On the second day we added the circles in rainbow order. I actually printed circles on construction paper and cut them in squares for the children. Students used sticker eyes for the head and added mouths and antennas with a black sharpie. Kindergarteners then created various line patterns on each circle, cut them out, glued them to the head (making sure not to glue them right onto the branch) and then added legs. I gave a little lesson on how the legs should be facing the same way. 
This was a perfect lesson to do in the spring since all the kindergarten teachers do a unit on butterflies.


This little guy was absent on the day we painted the branches so he quickly drew one on his paper with a marker.  

Monday, May 1, 2017

art show 2017

Art Show 2017

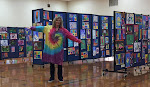
 Don't you love my tie dyed lab coat?  I had a lot more parent volunteers helping me this year. It really helped  asking the teachers to ask for volunteers through e-mails and their weekly newsletters.
 I recommend having tables to put the tape on the art. Last year I did it on the floor and my back was killing me! 
My volunteers! 

I used screens purchased from Screenflex. They work better if you staple the art while the screens are folded. It keeps them more stable while  you push the staples in. 

This year I  drew picture frames on paper so children could draw on them. I found this idea on Pinterest which was pinned to Thomas Elementary. 


My daughter helps train dogs for Four Paws, so she brought this little fellow for the kids to pet. 


Every year the principal and superintendent pick art to hang in their buildings. These were the winners.


 We have the art professionally framed. It's a great honor for these students that my school has been doing for years. 


Our photo booth!


Until next year's art show! 


Tuesday, April 25, 2017

Van Gogh Sunflower mural kindergarten art lesson

Van Gogh sunflower Mural

I was so excited to get to go to Amsterdam over spring break. Of course one of the first things I did was visit the Van Gogh museum! The sunflower painting is amazing! I wish the museum would let visitors take  photos. They did have have this mural where you could have your picture taken. Not the same!

Yes, it was cold in April (thus why I still have my coat on!).
Seeing the sunflower painting made me want to teach my students about Vincent's sunflowers.
I found a  great lesson on the blog by Mr. Giannetto. Here is the link http://youngschoolart.blogspot.com/2014/10/1st-grade-sunflowers-in-progress.html. I just changed it a little.
I first read the book "Camille and the Sunflowers" by Laurence Anholt.

 I showed the students several examples of  his sunflower paintings and then we set to work.
I put paint on paper plates for each table and then we painted a sunflower together on brown construction paper. 


When they were dry, students cut them out and glued them to the vase I had drawn previously. They loved this lesson and they turned out beautifully! 


Wayne Thiebaud model magic lollipops kindergarten art lesson

Wayne Thiebaud model magic lollipops
I've seen this lesson many times on the internet. I actually used http://artinklings.blogspot.com/2015/12/wayne-thiebaud-inspired-lollipops.html idea for  my kindergarteners. 

I showed the students part of the interview of Wayne Thiebaud from CBS morning on Youtube. I think it actually gets the students excited about the project if you can find photographs and videos of the artists working. 
I then demonstrated how to roll the model magic into a ball and then make it into a coil.

 After the students rolled the ball into a coil they swirled it around to make the lollipop. 

I then pushed a craft stick into their lollipop. From my experience, if I had them push it in, they would become frustrated and ruin their lollipop. This project only took about twenty minutes for the lecture and the art making time. 


On the next art day, students painted their lollipops with watercolors.