Please hang tight while I reload all the photos back.

My photo
I currently work at Davenport A+ Elementary School in Lenoir, NC.

Friday, December 16, 2016

1st grade crayon resist snowmen

1st grade snowmen

This is another great project I found on Pinterest. I just changed it a bit. It's from http://createartwithme.com/snowman-painting-markers/snowmanpainting/
I first showed the students real snowflakes and snowflakes by artists. There are some great videos on the formation of snowflakes on YouTube. 
We also discussed parts of a painting (foreground, middleground and background) and how things in the foreground are usually bigger than the things in the background. 
I provided patterns for the body of the snowmen and students traced them in the foreground. 

Students added details and the land. Make sure to tell students not to add a hat so snowflakes can be added. Trace everything with a sharpie. 
The next step was to draw snowflakes and the wind. I showed them the painting of "Starry  Night" and we discussed the wind. Students drew snowflakes and the wind with a pencil and then traced them with a white  crayon. 
This was day One. 
On day two students painted the sky with cool colors and added watery blue to the sides of the snowman and the land. 


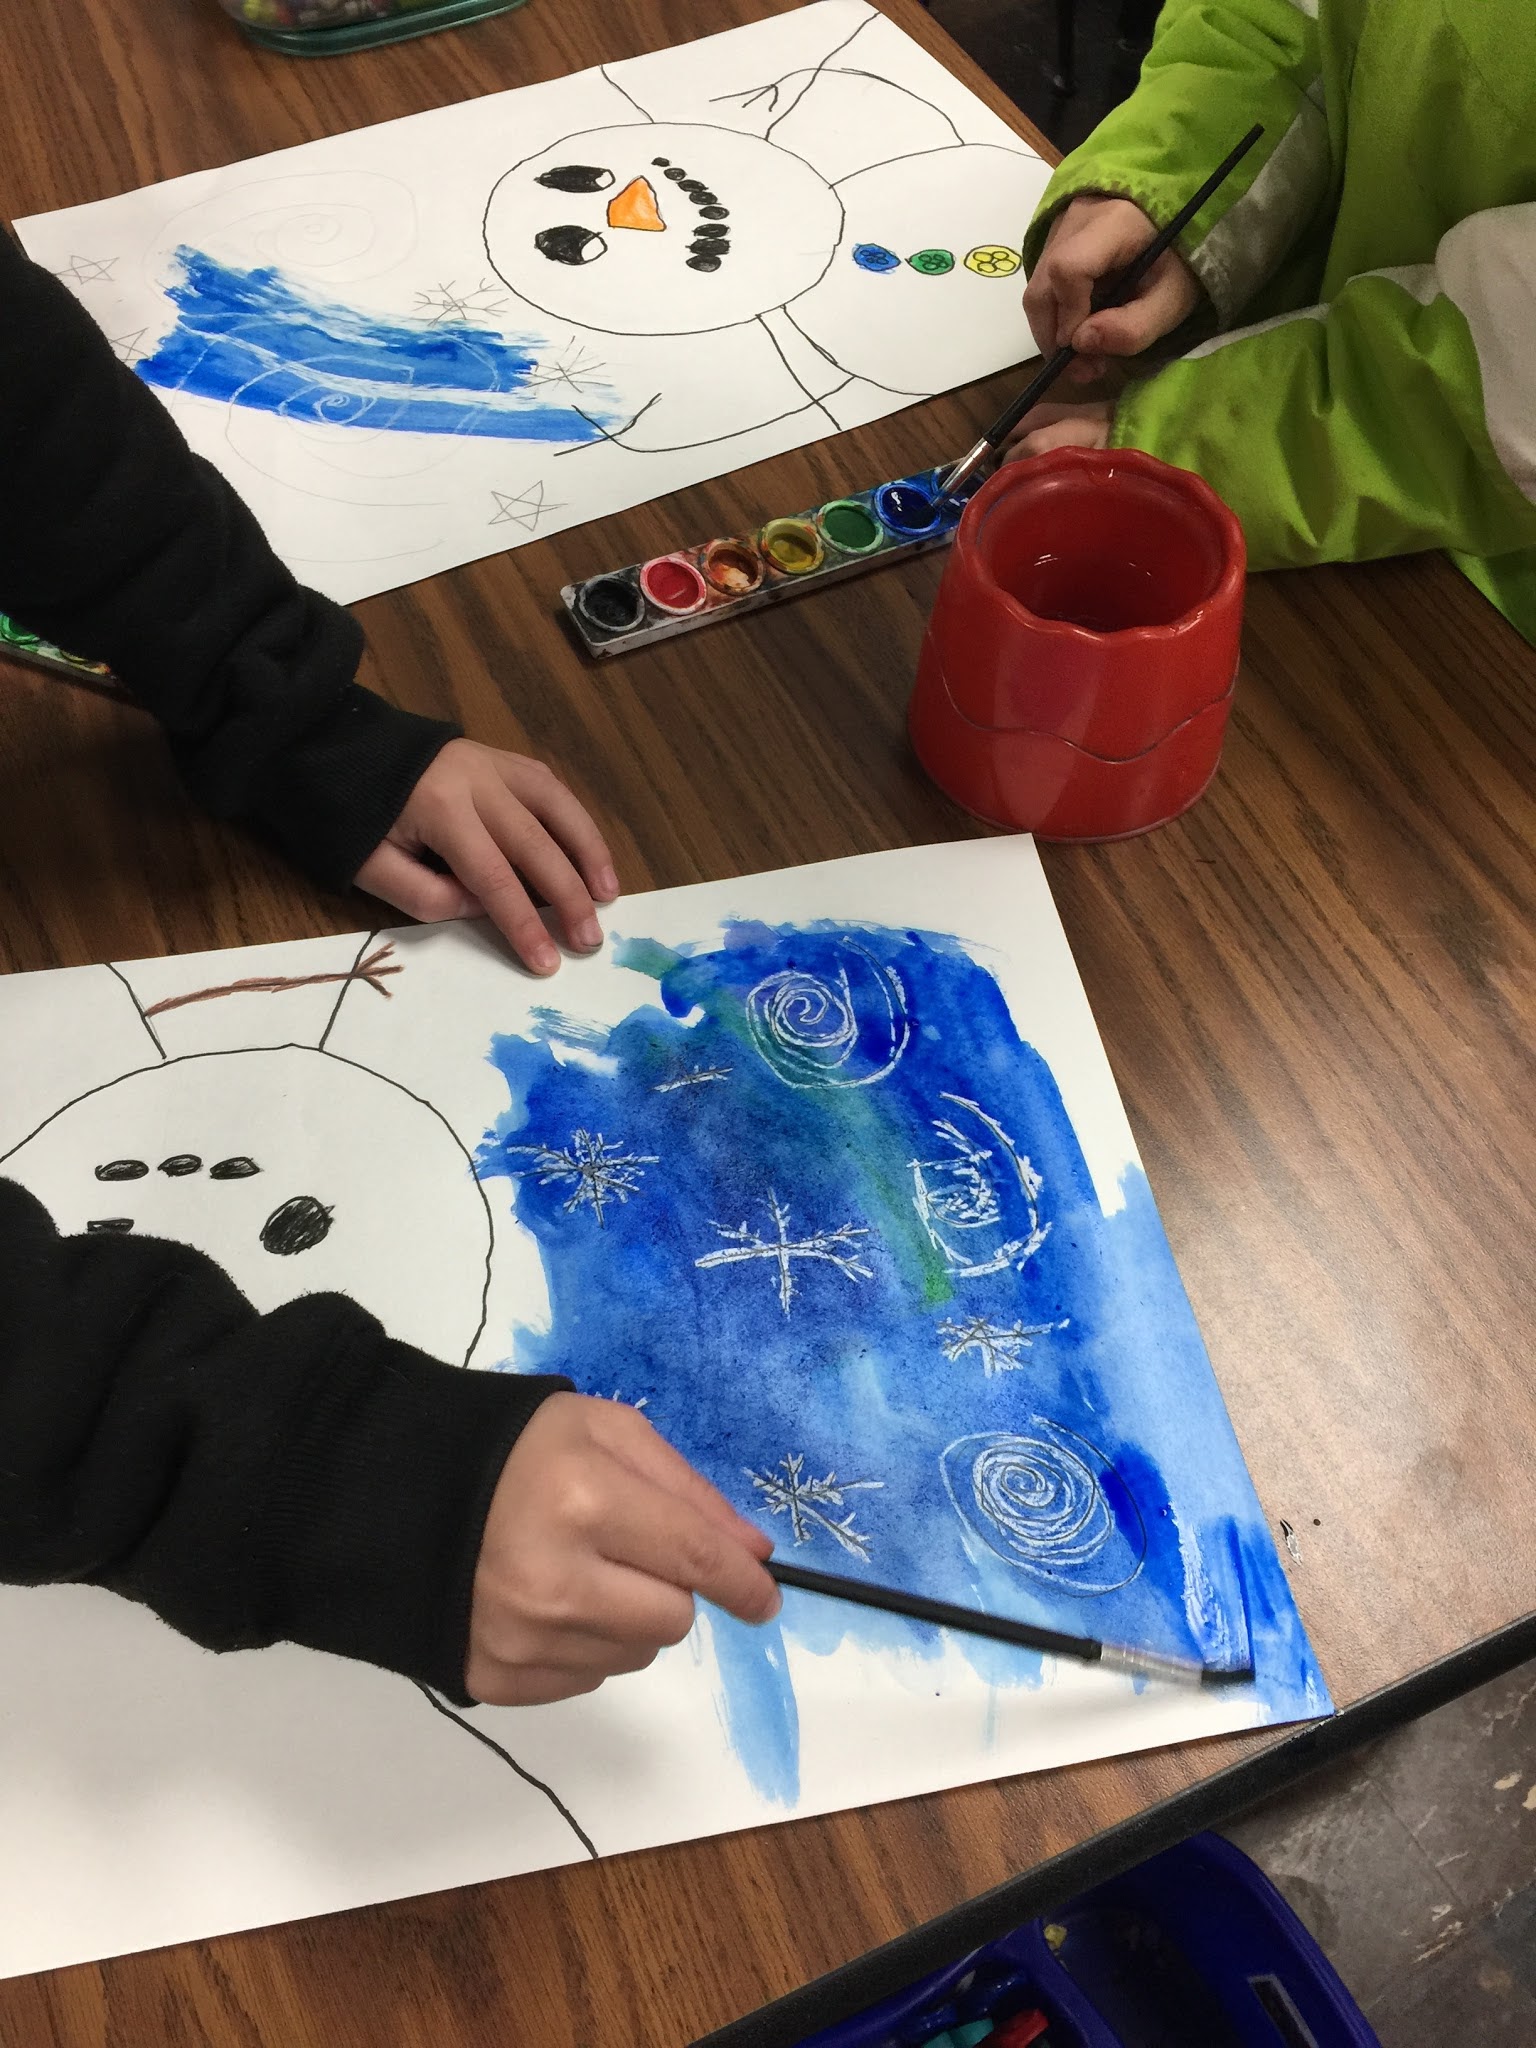
I love these! The children loved them as well.


Wednesday, December 14, 2016

Jackson Pollock marble painting kindergarten

Marble painting
This is the third project in our Jackson Pollock study. I again showed the students the books I  have on him in our classroom art library and some of his abstract paintings. 
I demonstrated how to drop a marble in the bowls of paint with a spoon and then dropped it on a piece of paper in a box lid. I used the box lids from the copier paper boxes. I have six tables so on each table I had one color and one marble. In the past I had two marbles in each bowl, but amazingly one would always disappear from the classes. Interesting, right? No one never knows what happens to them!

After students do the color at their table then they may carry their papers to the other tables to complete.


Great time to problem solve and take turns!

Great project for the beginning of the year. 


Wednesday, December 7, 2016

1st grade art lesson for yearbook contest

1st grade yearbook contest

I was approached to come up with an idea for our primary school yearbook cover. We decided to have a contest and the winner would be chosen by the office staff.  I found "United We Stand" from a google search and then went from there. I have nine classes of 1st graders with each class having 24 students. On the first class I demonstrated how to draw ovals for heads and then instructed them on how to draw bodies. This did not work for this grade level. Developmentally they weren't ready for this. I decided to provide oval patterns for their heads for the remaining classes.  This was much better!!
I copied "United We Stand" on card stock since the requirements had to be 11" x 8.5". 
Students were then provided with an oval pattern. I instructed them on how to draw the bodies and how to extend the bodies past the "United We Stand" bubble if they needed to. 
Students traced the people with sharpies and used color sticks (colored pencils without the casing) to color. 


Lastly they painted the background and the "United We Stand" bubble with watercolors. 


Not sure of the winner yet! They were awesome! 


Wayne Thiebaud Value study 1st grade art

Wayne Thiebaud 1st grade art lesson
Yes, another idea I found on Pinterest! I just changed it a bit. You can find the original lesson plan here http://mrstsfirstgradeclass-jill.blogspot.ca/search/label/Colors. I believe she found the idea from We Heart Art.
On day one discussed "values" in art and defined the terms "shade" and "tint". I showed part of the video from YouTube "The Value Song" from Scratch Garden. It's perfect for 1st graders.
We then reviewed complementary colors. Students were then told that they could pick an ice cream flavor color and then it's complementary color which would be used for the background.
Quickly I gave each student a 12" x 18" piece of multi media paper. Students then mixed white paint and their color directly onto their papers (no waste of paper plates or containers to wash!).
Students then took a 12" x 9" white piece of multi media paper and folded it into fourths. Students then had a small paper plate with their color choice for their ice cream and painted the first box. On the second box I squirted a little white paint and had them mix it to make a tint color. The third box is where they made a shade of their color. I squirted a small amount of black paint into their box. On the last box, I squirted more black paint to make a darker shade. Again, no need to wash their brushes since they had their own paint and was only using one color. We worked very quickly to get both pieces painted. This was completed in one 50 minute class period.


On day two, I showed several examples of Wayne Thiebaud's paintings of ice cream cones as well as his famous painting of "Cakes". I provided an ice cream pattern for students to trace on each section of their shades and tints papers. I also provided a triangle pattern for students to make the cone from brown construction paper. Students then drew lines on the cone to make it more realistic.


Students could then make a cherry from small pieces of red construction paper and add sequins for sprinkles. This is a great lesson to teach shades and tints. It may be a bit "crafty" but I think they all turned out differently.


Tuesday, December 6, 2016

Kindergarten snowflakes

Watercolor snowflakes

This is another great idea I found on Pinterest. It is from http://www.funathomewithkids.com/2014/11/winter-watercolor-resist-art-with-free.html
I started the lesson by showing examples of real snowflakes and a short three minute video on YouTube about snowflakes. There are several but I chose the one "Frozen, Snowflake Song". 
I then instructed students on how to make snowflakes by drawing the lines and adding arrows to each line. We drew these all around our 12" x 9" multi media paper with a pencil. The next step was to trace over the lines with a white oil pastel. 
You can use white crayons as well. 
Students then painted over their papers with liquid watercolors. 


The last step was to sprinkle salt over the painting. 


  I had some of my classes make one big snowflake and other classes make five small snowflakes. I'm not sure which ones I like the best.