Please hang tight while I reload all the photos back.

My photo
I currently work at Davenport A+ Elementary School in Lenoir, NC.

Saturday, April 30, 2016

Chihuly paper bowls kindergarten art lesson

Chihuly Paper bowls


Students were introduced to the glass bowls by Dale Chihuly. I found a great You tube video for kids where it shows how he makes glass with his team. The students think he looks cool with his eye patch! 
Students first colored coffee filters with various markers. They could put any designs on the them as long as the entire filter was colored. Each student wrote their name and teacher code on a small card. This would be what we would put inside of their cups while they dried. 


 When completely colored I helped students wrap it around around a plastic cup and secured it with a rubber band. I then (while they watched), sprayed the entire thing with spray starch. I used one can per 35-40 students. It's only about a dollar a can. 

We put their name card inside the cup and put it on a shelf to dry. 


On the next class, students wrote their name and teacher code on a fresh card and glued it to the bottom of their bowl.
I have been doing this project for years, so I'm not sure where I saw this idea. 


Wednesday, April 27, 2016

Flower pot collage 1st grade art lesson

Flower pot collage

I introduced the lesson by showing the art work by Susan Mahan. She is a Cincinnati Ohio artist that works with cut paper and makes beautiful multi media paintings. Her website is http://susanmahan.com/
This is one of her works. 
I found this idea from http://plastiquem.blogspot.com.es/ and made my own changes.  
I provided a flower pot for the students to trace. They used a plastic cup to trace circles for their flowers onto multi media paper. 
We reviewed the meaning of shades in art and then students searched for colors in magazines to glue to their pots. 

I think it is best to use a glue sponge when applying the colors to the flower pot. It goes much faster and less messy! 
They traced their circles with a fine tip permanent marker and colored them with crayons.
I had them pick a wall paper sample for their table cloth and they glued everything on a 12" x 18" piece of construction paper. I also provided cut strips of green construction paper for the stems.
This took three, 50 minute class periods.


Tuesday, April 26, 2016

Picasso guitars kindergarten art

Picasso guitar collages

I borrowed this idea from youngartlove.wordpress. As most art teachers I changed it a bit to fit my classroom needs.
There are tons of children's books on Picasso . These are just a few of mine. These are long so they are available for my students to enjoy in my art classroom library. 
The first day of the lesson we discussed warm and cool colors. Students were give a choice of either warm or cool colors to paint their 12" x 18" multi media paper. I provided lots of various tools for students to add textures. They had a blast.
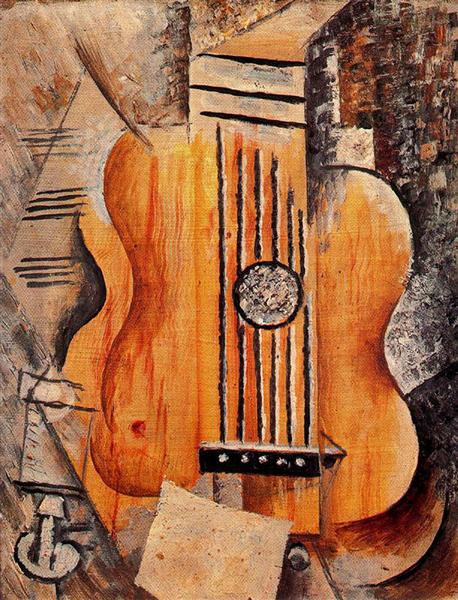
On the second day of class I gave a brief introduction to Picasso's "The Old Guitarist"  and "Guitar, I love Eva".

We discussed the details of the guitar and then set to work. Students were provided patterns of guitars to trace on the back of their painted papers.
 After they cut them out they glued them to a piece of construction paper. 
Students then traced a circle onto a tissue paper square (we used a water cup), and added yarn and buttons. 
Lastly students added dots using tempera paint and bottle stoppers. 
It was a lot of work but students had fun doing this project. 


Japanese Fish Kites 1st grade art

Japanese Fish Kites

On May 5th the people of Japan celebrate Children's Day. On this day families raise a carp shaped flag. There is a legend about a carp that swims upstream and becomes a dragon. As the wind blows the flag it looks like it is swimming. 
I purchased packs of kites from an art supply company. They come in packs of 24 and are very reasonably priced. I think they average about nine dollars a pack.
Each child wrote their name and teacher code along their mouth with a pencil, making sure to write dark.
They were then instructed to color the kites with bright colors and patterns.  We didn't worry about getting all the white spaces because once you spray them with water the colors bleed together. 


Don't forget to have the children cover their tables with newspapers. 


Once dried, we glued a piece of cardboard to the mouth (it comes in the kit) and added a string. 


The 1st graders had so much fun with this project. 


Saturday, April 23, 2016

Matisse Inspired still life collage 1st grade art

Matisse Inspired Still Life collage

I combined two art projects I found on Pinterest and then changed it to fit my needs. One was from doartimagineexplorecreate.blogspot and the other was from Artsonia. 
I introduced the lesson by showing various pots and vases from around the world. We discussed the patterns and designs and then the purpose they were used for. 
Students folded a 12" x 9"  piece of construction paper vertically. I showed them various ways to make vases and then let them design their own. Before I allowed them to cut I checked each one. In every class it seems someone always draws the vase on the opened part of the paper. Once I had given them the okay then they were allowed to cut.

Students then took cardboard rectangles and cork stoppers and printed patterns on their vases. I only provided white and black paint. 


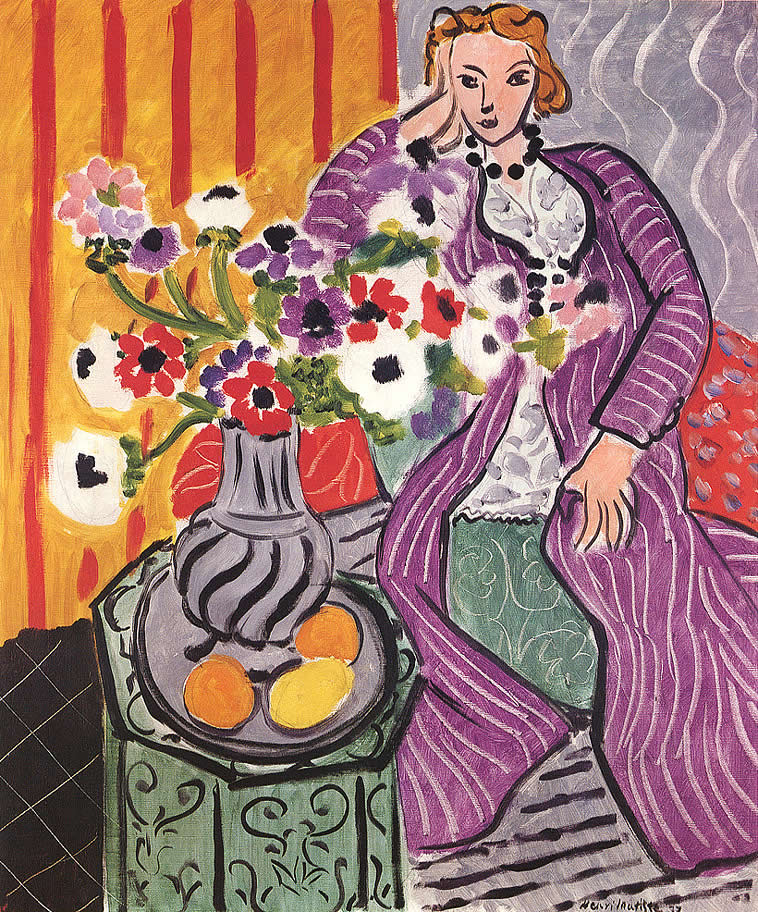
On day two I introduced the students to Henri Matisse's still life of flowers. 
Students then picked a piece of construction paper and divided it into four sections. They used construction paper crayons and created patterns in each box. 


Students then glued their vase towards the bottom of their paper and created flowers. We used a green oil pastel to make the stems and then used tissue paper to make the flowers. They traced the vases with a black oil pastel to make them "pop".

No two were the same. This took two, 50 minute class periods.